Tuesday, August 27, 2013

Taters Precious!

"What's taters, Precious?" Golem queries Samwise over a bubbling pot of rabbit stew in Lord of the Rings: The Two Towers. This line, one of my favorites in the series, spawned a tradition in my family. We no longer call them, as Sam would say, "PO-TAY-TOES." They are taters precious.  Boil em', mash em', stick em' in a stew, they are taters precious. And man do I love potatoes. Love em'! I make some fabulous potato dishes all year round, but I am known for my potatoes of awesomeness come Thanksgiving and Christmas, but that is another blog. This is about the spuds themselves and how to preserve them, namely through my favorite preservation method, canning! I didn't know you could can potatoes! So I was just dying to try it out the moment I read about it on my favorite canning site www.sbcanning.com.

Now according to experts, the best spuds for canning are the same as the ones you would use for mashing. That would be your russets and yellows. I love Yukon Golds for a good mash, so I used those. Now you might be concerned about the potatoes taking on too much water. Certain kinds will, others won't, which is why the two types I mentioned are ideal for this method of preservation. This recipe will yield 7 pints minimum. However, using it, I had A LOT of potatoes left over, so I would maybe cut back by one five pound bag next time, but I did use what was left for a great potato soup. I am posting the recipe as I found it though.

You will need:

20 pounds of potatoes
Kosher or canning salt
Ascorbic acid (to prevent browning)

Method: Pressure canning


First thing's first, prep all your tools, wash your jars. For pressure canning there are some different steps than water bath method canning. Fill your pressure canner with three quarts of water and two tablespoons vinegar. Fill your clean jars with clean water and set in the canner, adding water to them so they don't float if need be. Turn to high and bring to a simmer and keep it there until needed. Also, get a big pot of water boiling for the potatoes. Next, peel your potatoes. I like to put a plastic shopping bag around a bowl to catch all the peelings. This certainly makes clean up easier!


Once peeled, give your potatoes a good wash. This was done in batches to make it easier.


You can can the potatoes whole, provided they are small enough, but with larger spuds like these, I opted to chop them up in about 1 inch chunks.


Plop the potatoes in water containing the ascorbic acid. Follow the directions on the label for the water to powder ratio. Ascorbic acid can be found in your local grocer's canning section.


Drain the potatoes of the ascorbic acid water.


Place in pot of boiling water and boil for two minutes. Do not over cook them and watch for those tiny bits! They will cook first and mush! Note: Your camera lens will fog up from boiling potatoes.


Remove the jars from the pressure cooker, pouring out the hot water. Use a jar lifter to do so as it is easier and safer than hot pads. Drain potatoes. Add one teaspoon kosher or canning salt to each jar.


Pack the potatoes into the jar. Leave a good inch of space from the top of the jar. The handy dandy canning funnel is great for measuring head space.


Top off the jars, maintaining the one inch of head space, with fresh hot water.


Run a plastic utensil around the edges to release air bubbles.


Cap the jars and screw on bands until finger tight. That nifty gripper there was a recent find in Wal-Mart's canning department. It keeps you from burning your hands on hot jars, and grips them tight while you screw on the bands.


Place jars in the canner, making sure they don't touch and have a little space between them and that they have a good three inches or more of water around them.


Place the lid on the canner and process at 10 pounds of pressure for weighted, 11 for gauged, for 40 minutes.

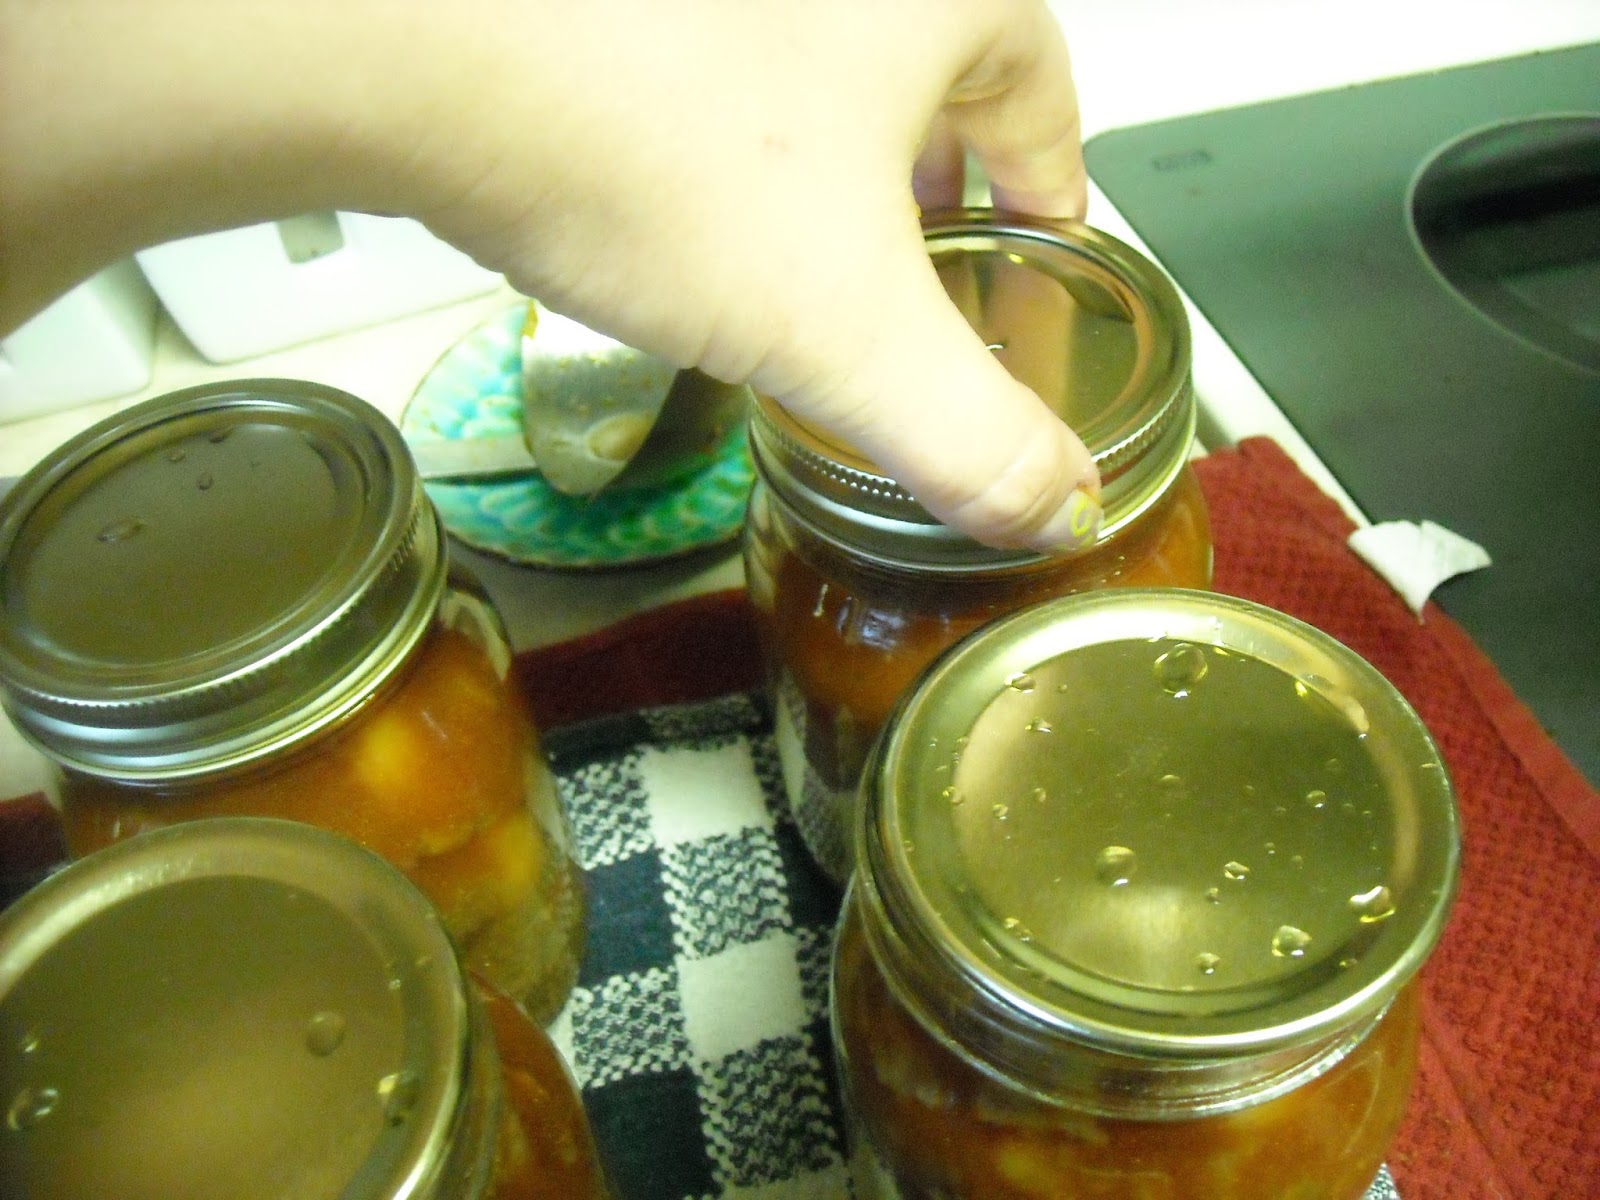
Once time elapses, turn off the heat and let the canner drop down from pressure on its own. Once that occurs, remove jars and let sit on a towel somewhere where they will be left alone for 24 hours. After that you can take off the rings, label and store them.

Note: Don't panic if the water becomes cloudy. Its just the starch from the potatoes leeching into the water.


Now I have my taters precious ready whenever I have need of them! If I want to pop some in a stew or mash some up, all I have to do is open up a jar of my very own canned spuds. If I want to mash them, I just pour them into a pan with some water and boil them until tender. So easy! I was so glad I found this recipe. I'm also glad Danyale didn't mind coming over to help me peel 20 pounds of these golden babies! This is a pretty big task, so I HIGHLY recommend having a friend come over to lend a hand or two! I think even Golem would be impressed these beauties!

Brightest Blessings!

Saturday, August 17, 2013

Tons of Tomatoes!

I love to can. That is quite obvious to anyone who has been following this blog, my Facebook page or knows me at all. Apparently, this condition of chronic canning is contagious! I've hooked several of my friends on the joys of preserving homemade goodness. Besides, anything is better when you have people to share it with, right? So when I found some great deals through Sam's, the Farmer's Market and my local HEB on tomatoes, I figured it was high time to get some girlfriends over and get to work!

Now I think all together we had about 24 pounds of tomatoes. I use tomatoes in all kinds of recipes. Diced tomatoes are great for anything from pasta, to soups, to even topping a pizza. And you can never go wrong with tomato sauce for a quick pasta dinner on a busy weeknight. So I figured we could try both methods with this mass of ruby red goodness.


I will outline the method for both here. This was my first time doing any of this so I followed tips in my canning books on what to do. You can never read enough, that is my firm belief, and I tend to go a bit overboard on buying books to help me with all my hobbies. That being said, the book on canning that I HIGHLY recommend is the Ball Complete Guide to Home Preserving. Its available pretty much in any book store and also on Amazon and Barnes and Noble's website. If you plan to can, get this book!

Lets start off with the one that requires a bit more time and patience: Tomato sauce.

You will need:

Tomatoes (of course) I used about 12 pounds of Roma
Lemon juice
A food mill, food strainer, or a cheese cloth lined sieve
A Large non reactive pot
Knives and cutting boards
Seasonings and spices should you wish to flavor your sauce
*NOTE* You CANNOT use packaged spices, such as pasta sauce spice mixes in a pouch, UNLESS it is a pre-approved canning spice mix, which you will find in the canning section of your local Walmart, Tractor Supply or grocery store.
Jars (I used pint sized)
Water bath canner

First thing is first: wash everything! All your jars, tools and pans to clear away any dust that may be on them. Fill your water bath canner with water, and two tablespoons vinegar to keep off hard water marks, and get it on the heat to boil. Sterilize and heat your jars either by running them through your dishwasher on a sterilize setting and leaving them in on the hot drying setting, placing them in boiling water and keeping them there until ready for use. Place all tools in hot water, caps in a saucepan of water that has been boiled, and then the burner shut off or turned to low.

Now you want to quarter up your tomatoes, if you are using a food strainer attachment for your Kitchen aid, like I am, or a food mill, this makes it easier to work with.


Next run your tomatoes through the food strainer. I use my Kitchenaid set up as you see here in the photo, one bowl for the pulp, one for the seeds and skin, or as we call it "Fruit Poop". 


Once you have strained all your tomatoes, pour the pulp into a nonreactive pot. This can be messy, I learned. I got covered in tomato goo. Its a good thing my friends, Tracy and Danyale were there to take photos!


Now don't be put off if its watery, that is completely normal. The cooking process will cook off a lot of this water. Bring the mixture to a boil over high heat. Once it is boiling, bring it down to a simmer and cook down until reduced by half, or it has reached the thickness you desire. This takes time, so be patient!


Once its as thick as you like you can go ahead and get ready to ladle it into jars, or season it for pasta sauce to your taste. I did mine half and half, filling up four jars and then seasoning what was left in the pot.


Before you ladle your sauce into the jars, add two tablespoons of lemon juice to each jar, whether its seasoned or not. This helps with maintaining acidity, color and freshness and prevents spoilage when preserving.


I remembered the lemon juice after I started on a jar! Whoopsie! Ladle the sauce into your jars, leaving 1/2 inch of head space. I found a neat funnel that does the measuring for me and helps keep your jars clean. But I still recommend wiping the rims before you cap them and twist on the rings.


Once your jars are ready, place them in the canner, ensuring that the jars are covered by at least one inch of water. Do not start timing until the water reaches a boil and process for 35 minutes. Remove from the water, set on a towel on the counter or table and do not move them for 24 hours.

While the sauce was processing we started on the diced tomatoes, which are rather easy, though require a tiny bit more work.

You will need:

Tomatoes (12 pounds here again, beefsteak)
A large pot of boiling water
A bowl of ice water
Strainer
Knives and cutting boards
Jars (pints again)
Boiling water canner

Start by getting a large pot of water boiling.


Wash the tomatoes.


Remove the stems. You can core and seed them if you like, but I leave my seeds in.


Cut a shallow 'X' in the bottom of each tomato.


Get your bowl of ice water ready


Now place the tomatoes in the boiling water for a few minutes, or until you start to see the skin starting to peel away.


Once out of the boiling water, place in the ice bath to stop the cooking. Leave for five minutes. Drain the tomatoes. Do not pour out the water in which you blanched the tomatoes. You are going to use that.


Now peel off the skin of the tomato. Its super easy like this, they just pull away!


Dice up the peeled tomatoes.


Add one tablespoon lemon juice to each of your jars and fill about 3/4 of the way with diced tomatoes, topping it off with the water you blanched them in leaving one inch of head space. Run a plastic utensil, chopstick or bubble popper around the sides of the jar to release air bubbles.


Wipe the rims, cap and twist on rings to finger tightness. Process in boiling water bath for 35 minutes. Again don't start timing until it is boiling again and let the jars rest for 24 hours after they have been removed.


Tracy, Danyale and I spent the whole of a day in the kitchen making the tomatoes into canned goodness. We chatted about everything from husbands, to tv shows, music and of course food. We all celebrated the 'PING!' that announced the sealing of our jars and reveled in the fun of doing something together that would bring enjoyment to our families in the coming months. I was sore by the end of the day, and exhausted but I had so much fun I didn't care and went to bed with a smile. Something about canning just always brings out the best in me, even if I drag friends into it and we may have to start a support group...we already have a canning club, does that count? 

Brightest blessings!

Wednesday, August 7, 2013

A Taste of Home While Far Away

For the last year and a half my husband has been working overseas in Afghanistan. So of course I am frequently sending him care packages. They are usually full of cookies, microwave meals and anything quick he can make up using a microwave. And usually packed full of preservatives and who knows what else. Recently, my hubby came home pretty sick, with a nasty bug that he got overseas somehow and I began to wonder if maybe the food was making him ill, especially since we don't usually eat all that stuff when he's home. Sure we do boxed dinners from time to time or frozen pizza, but we had started transitioning from all of that to homemade things. I learned I could make a pizza dough better than any frozen pie in just five minutes and the result was so much tastier than what we would buy in the frozen foods. Half the time we don't even buy bread! So this got me thinking if maybe I could figure out how to make some homemade goodness to send to my hubby.

It was not too long after all this that a dear friend from Circle, affectionately known as Spider-Man due to his fondness for posting spider photos on Facebook and tagging all us ladies in them, had gotten orders to deploy to Afghanistan as well. Upon learning of this, my friend Danyale said to me that she had read of a woman who canned homemade meals, like stews, soups, beans and even a kind of pot roast for her son and sent it overseas to give him a taste of home. She wondered if we could somehow do the same for my husband and Spider-Man. So we went to work on figuring out some recipes to utilize. I successfully canned a chili I made from throwing together ingredients I had on hand using my Rancor pressure cooker. Now that we knew we could do it, it was time to get to work. But first....I needed a bigger pressure cooker! My poor Rancor could only handle four quart jars at a time, and five pints. We have men to feed! That was not nearly enough! So I sweet talked my honey into a Presto 16 quart model that can do eight pints at a time! It was showtime!

I decided one evening that it was time to try out my new pressure cooker and I had found a beautiful goulash recipe specially made just for canning. So I headed off to my local HEB the next day and got all my ingredients to get it going and now I am going to share it with you!


Now I doubled the recipe but this is the original:

4 pounds beef chuck roast cubed into stew meat sized peices
1 tablespoon of salt (use either kosher or pickling, never iodized for canning)
3 tablespoons paprika
2 teaspoons dry mustard
1/3 cup of oil
6 stalks of celery cut in half (I cheated and bought pre chopped)
1 cup of water
1/3 cup of vinegar
3 bay leaves
20 peppercorns
2 teaspoons caraway seeds
3 medium onions cut in half (again cheated bought the pre chopped kind)
4 large carrots cut in half (I used baby carrots here, about a bag will do)


Mix the salt, paprika and mustard together. A whisk is very helpful as paprika likes to clump a bit and it will get the spices nicely blended. 

 Its easiest to put the meat in a nice big bowl for this part as you are wanting to coat it in the seasoning blend. Sprinkle all but about 1/4 of it over the meat and roll it around to get it coated. The meat will turn a lovely orange-y color from the paprika.


Heat the oil in a dutch oven over medium-high heat so it won't spit at you.


 Now you may have to do this in batches, but brown the meat until all sides are seared.


Place the whole spices (caraway seeds, peppercorns and bay leaves) in a cheese cloth and tie it securely. If you don't have cheesecloth, a little cloth bag will do fine. I've even seen people use coffee filters that they managed to seal shut with some butcher's twine. This is so you can get the flavor from these aromatic spices but not have to worry about fishing them out later as they are not pleasant to eat.


Now in the recipe you are supposed to toss in the ingredients in the same pot you started cooking the meat in. I was originally planning to put this in a slow cooker until I realized mine was not big enough! (YIKES!) So instead, I got out my huge stock pot.


Add the meat to the stock pot.


Sprinkle the remaining seasoning blend over the top of the meat.


Add in the onions, celery, and carrots. Toss a bit to mix it all up.


Next lets get some liquid into this party. Add the vinegar and water.


Stir it around to get as much combined as you can and top it with your spice bundle.


Cover and let simmer for about 2 hours or until the meat is tender. Don't worry about how little liquid there seems to be. The onions and celery will soften and the meat will cook off, releasing juices that make a nice broth with the water and vinegar as it cooks.

Once the goulash looks like its about ready, its time to get your pressure cooker ready. Pressure canning is a little different than water bath canning. You still need to wash your jars, sterilize your tools, and get the caps in hot water that was boiled and then the burner turned off or left on low. Once the jars are clean, fill them about 1/4 of the way with water and set on the rack that sits on the bottom of the pressure cooker. Fill the pressure cooker with about three quarts of water. Turn the heat to high and bring to a simmer.


When the goulash is done, remove the spice bundle and throw it away.


Remove the jars from the pressure cooker, pouring out the water, and set on a towel on the counter. Don't want it sliding around as the bottoms are wet.


Ladle the goulash into hot jars with 1 inch of head space. I got a handy dandy new funnel that not only keeps the jar rims clean, but helps me measure proper head space.


Run a plastic knife, handle or bubble popper around the edges of the jar to remove air bubbles.


Wipe the rims just in case, better safe than sorry you know!


Cap the jars.


Place screw bands on and tighten to just finger tight.


Gently place inside the pressure cooker making sure to leave space between the jars. You want steam and heat to be able to circulate without any trouble.
 Note: NEVER put the jars in the pressure cooker or water bath pot canner without a rack at the bottom. The jars WILL shatter if they are in direct contact with the bottom.


Place the lid on the pressure cooker and lock in place.


 Now there are two different types of pressure cookers out there. A weighted gauge and pressure gauge. I have a weighted gauge. Not the little steeple type thing in the middle there? A weight goes over that to maintain proper pressure. For this recipe it is set at 10 pounds. The weight goes on that vent (Steeple I pointed out) after it has been spewing steam for ten minutes. This allows the pressure canner to get up to pressure. A silver button on the back of the lid pops up to let me know that the canner has reached pressure and prevents me from opening the lid. Once that has popped up, I can put the weight on. Pressure canning does require a bit of patience and it can be nerve wracking in the beginning. Mostly because the pressure cooker makes a lot of odd noises. It will start hissing steam like an angry snake with a stutter. But what you want to watch for, at least with the weighted models, is for the weight to begin to jiggle. It needs to steadily jiggle, not too violently mind you, in order to maintain the proper pressure. Adjust the heat to get the weight gently jiggling, and not staying still or doing some violent dance. (I found medium heat was perfect) Once that little thing starts dancing you can start timing. The time for this recipe is 1 hour for pints, 1 hour 15 minutes for quarts.

When the time has elapsed, turn off the heat. DO NOT remove the weight, move the canner, or attempt to open the lid. Allow the canner to return to pressure naturally. You will know when it is safe to remove the weight and open the lid when the silver button slips back down, unlocking the lid. Then you may remove the weight, and open the lid to remove the jars. They will be hot, so be sure to use your jar lifter tool.


Let the jars cool somewhere undisturbed for 24 hours. Label with the contents and date, then store.


This was my first adventure doing a large batch of canning in a pressure canner, and I have to admit it sounded scary at first but it proved to be easy and fun! Now I can make tasty homemade foods for my husband and friend without all the preservatives and chemicals found in those microwave meals I was sending before. I am hoping to find a great many more recipes to share and make to not only feed my hubby, but to also stock up my own pantry! It can be economical, healthy and fun to do your own home preserving and canning, especially when you get a bunch of friends involved like I tend to do. Check out some great books like the Ball Guide to Canning (The go to tome of home preservers everywhere!) Food in Jars by Marisa McMclellan or check out this amazing site! Not only are there recipes, but tips to get you started! www.sbcanning.com. Have fun!

Brightest Blessings!