Wednesday, August 7, 2013

A Taste of Home While Far Away

For the last year and a half my husband has been working overseas in Afghanistan. So of course I am frequently sending him care packages. They are usually full of cookies, microwave meals and anything quick he can make up using a microwave. And usually packed full of preservatives and who knows what else. Recently, my hubby came home pretty sick, with a nasty bug that he got overseas somehow and I began to wonder if maybe the food was making him ill, especially since we don't usually eat all that stuff when he's home. Sure we do boxed dinners from time to time or frozen pizza, but we had started transitioning from all of that to homemade things. I learned I could make a pizza dough better than any frozen pie in just five minutes and the result was so much tastier than what we would buy in the frozen foods. Half the time we don't even buy bread! So this got me thinking if maybe I could figure out how to make some homemade goodness to send to my hubby.

It was not too long after all this that a dear friend from Circle, affectionately known as Spider-Man due to his fondness for posting spider photos on Facebook and tagging all us ladies in them, had gotten orders to deploy to Afghanistan as well. Upon learning of this, my friend Danyale said to me that she had read of a woman who canned homemade meals, like stews, soups, beans and even a kind of pot roast for her son and sent it overseas to give him a taste of home. She wondered if we could somehow do the same for my husband and Spider-Man. So we went to work on figuring out some recipes to utilize. I successfully canned a chili I made from throwing together ingredients I had on hand using my Rancor pressure cooker. Now that we knew we could do it, it was time to get to work. But first....I needed a bigger pressure cooker! My poor Rancor could only handle four quart jars at a time, and five pints. We have men to feed! That was not nearly enough! So I sweet talked my honey into a Presto 16 quart model that can do eight pints at a time! It was showtime!

I decided one evening that it was time to try out my new pressure cooker and I had found a beautiful goulash recipe specially made just for canning. So I headed off to my local HEB the next day and got all my ingredients to get it going and now I am going to share it with you!


Now I doubled the recipe but this is the original:

4 pounds beef chuck roast cubed into stew meat sized peices
1 tablespoon of salt (use either kosher or pickling, never iodized for canning)
3 tablespoons paprika
2 teaspoons dry mustard
1/3 cup of oil
6 stalks of celery cut in half (I cheated and bought pre chopped)
1 cup of water
1/3 cup of vinegar
3 bay leaves
20 peppercorns
2 teaspoons caraway seeds
3 medium onions cut in half (again cheated bought the pre chopped kind)
4 large carrots cut in half (I used baby carrots here, about a bag will do)


Mix the salt, paprika and mustard together. A whisk is very helpful as paprika likes to clump a bit and it will get the spices nicely blended. 

 Its easiest to put the meat in a nice big bowl for this part as you are wanting to coat it in the seasoning blend. Sprinkle all but about 1/4 of it over the meat and roll it around to get it coated. The meat will turn a lovely orange-y color from the paprika.


Heat the oil in a dutch oven over medium-high heat so it won't spit at you.


 Now you may have to do this in batches, but brown the meat until all sides are seared.


Place the whole spices (caraway seeds, peppercorns and bay leaves) in a cheese cloth and tie it securely. If you don't have cheesecloth, a little cloth bag will do fine. I've even seen people use coffee filters that they managed to seal shut with some butcher's twine. This is so you can get the flavor from these aromatic spices but not have to worry about fishing them out later as they are not pleasant to eat.


Now in the recipe you are supposed to toss in the ingredients in the same pot you started cooking the meat in. I was originally planning to put this in a slow cooker until I realized mine was not big enough! (YIKES!) So instead, I got out my huge stock pot.


Add the meat to the stock pot.


Sprinkle the remaining seasoning blend over the top of the meat.


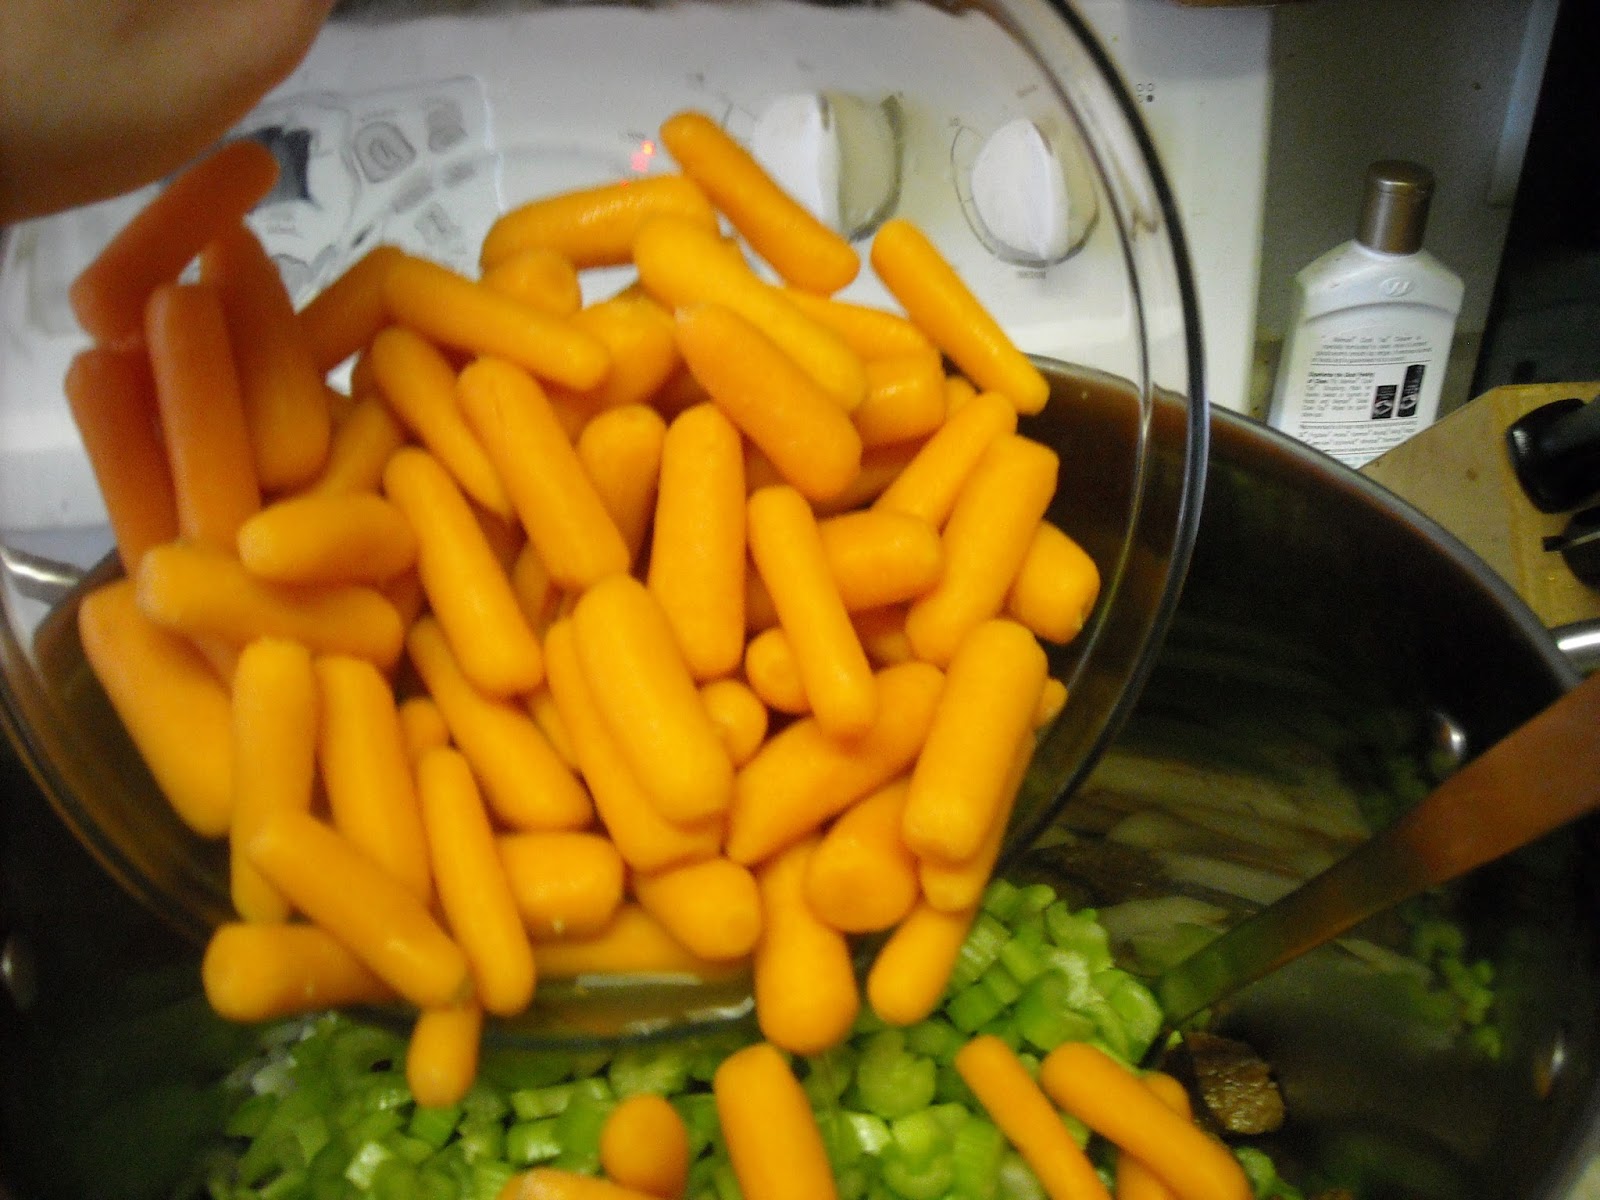
Add in the onions, celery, and carrots. Toss a bit to mix it all up.


Next lets get some liquid into this party. Add the vinegar and water.


Stir it around to get as much combined as you can and top it with your spice bundle.


Cover and let simmer for about 2 hours or until the meat is tender. Don't worry about how little liquid there seems to be. The onions and celery will soften and the meat will cook off, releasing juices that make a nice broth with the water and vinegar as it cooks.

Once the goulash looks like its about ready, its time to get your pressure cooker ready. Pressure canning is a little different than water bath canning. You still need to wash your jars, sterilize your tools, and get the caps in hot water that was boiled and then the burner turned off or left on low. Once the jars are clean, fill them about 1/4 of the way with water and set on the rack that sits on the bottom of the pressure cooker. Fill the pressure cooker with about three quarts of water. Turn the heat to high and bring to a simmer.


When the goulash is done, remove the spice bundle and throw it away.


Remove the jars from the pressure cooker, pouring out the water, and set on a towel on the counter. Don't want it sliding around as the bottoms are wet.


Ladle the goulash into hot jars with 1 inch of head space. I got a handy dandy new funnel that not only keeps the jar rims clean, but helps me measure proper head space.


Run a plastic knife, handle or bubble popper around the edges of the jar to remove air bubbles.


Wipe the rims just in case, better safe than sorry you know!


Cap the jars.


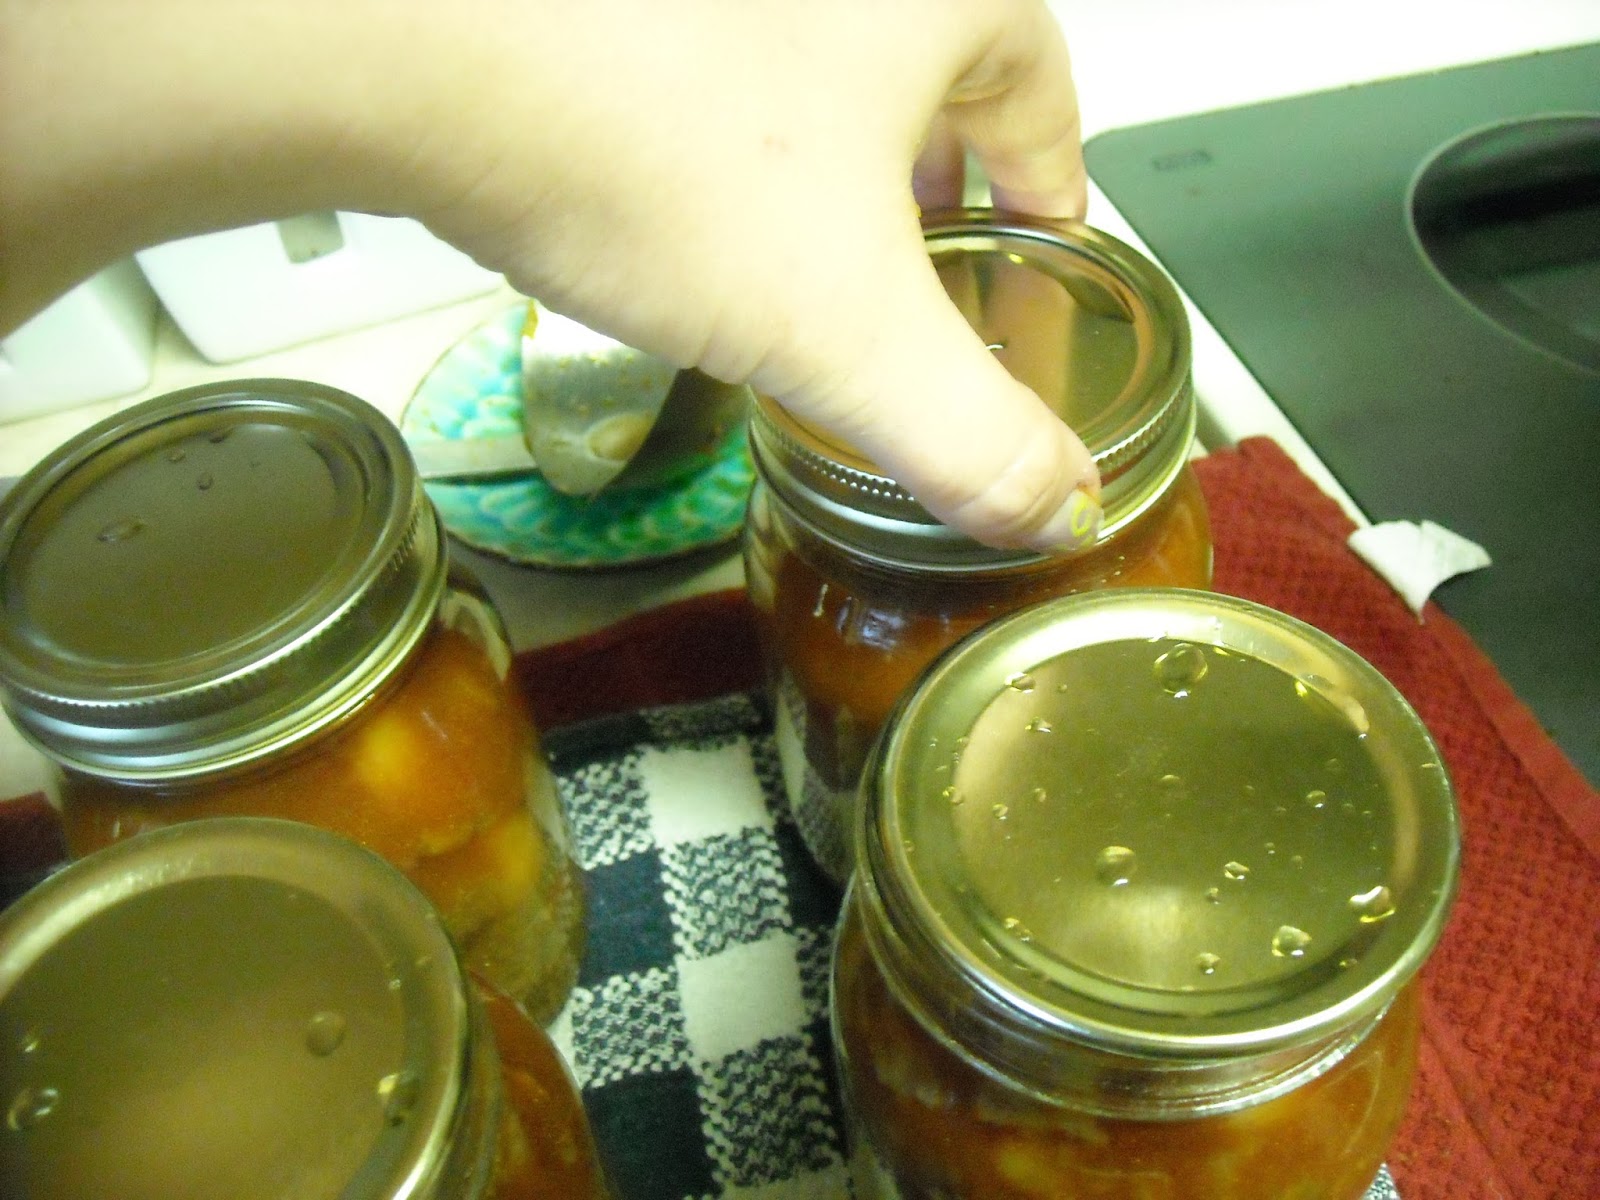
Place screw bands on and tighten to just finger tight.

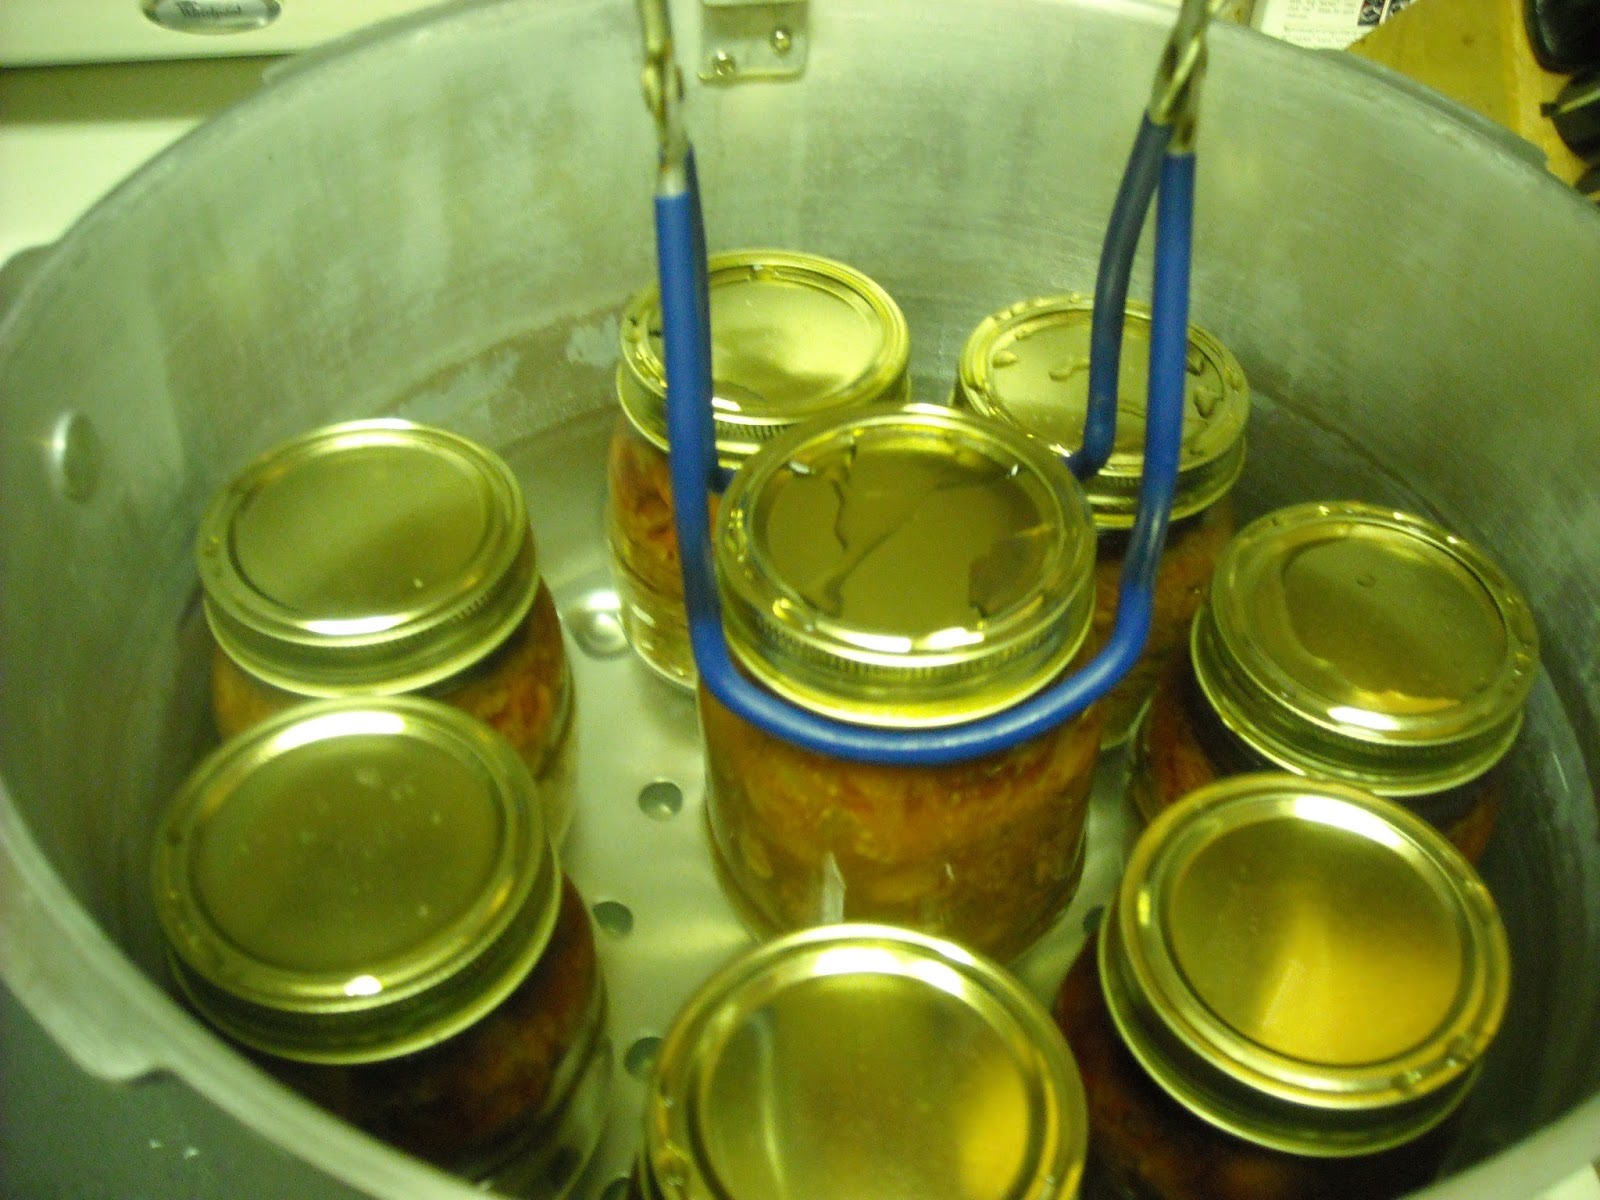
Gently place inside the pressure cooker making sure to leave space between the jars. You want steam and heat to be able to circulate without any trouble.
 Note: NEVER put the jars in the pressure cooker or water bath pot canner without a rack at the bottom. The jars WILL shatter if they are in direct contact with the bottom.


Place the lid on the pressure cooker and lock in place.


 Now there are two different types of pressure cookers out there. A weighted gauge and pressure gauge. I have a weighted gauge. Not the little steeple type thing in the middle there? A weight goes over that to maintain proper pressure. For this recipe it is set at 10 pounds. The weight goes on that vent (Steeple I pointed out) after it has been spewing steam for ten minutes. This allows the pressure canner to get up to pressure. A silver button on the back of the lid pops up to let me know that the canner has reached pressure and prevents me from opening the lid. Once that has popped up, I can put the weight on. Pressure canning does require a bit of patience and it can be nerve wracking in the beginning. Mostly because the pressure cooker makes a lot of odd noises. It will start hissing steam like an angry snake with a stutter. But what you want to watch for, at least with the weighted models, is for the weight to begin to jiggle. It needs to steadily jiggle, not too violently mind you, in order to maintain the proper pressure. Adjust the heat to get the weight gently jiggling, and not staying still or doing some violent dance. (I found medium heat was perfect) Once that little thing starts dancing you can start timing. The time for this recipe is 1 hour for pints, 1 hour 15 minutes for quarts.

When the time has elapsed, turn off the heat. DO NOT remove the weight, move the canner, or attempt to open the lid. Allow the canner to return to pressure naturally. You will know when it is safe to remove the weight and open the lid when the silver button slips back down, unlocking the lid. Then you may remove the weight, and open the lid to remove the jars. They will be hot, so be sure to use your jar lifter tool.

Let the jars cool somewhere undisturbed for 24 hours. Label with the contents and date, then store.


This was my first adventure doing a large batch of canning in a pressure canner, and I have to admit it sounded scary at first but it proved to be easy and fun! Now I can make tasty homemade foods for my husband and friend without all the preservatives and chemicals found in those microwave meals I was sending before. I am hoping to find a great many more recipes to share and make to not only feed my hubby, but to also stock up my own pantry! It can be economical, healthy and fun to do your own home preserving and canning, especially when you get a bunch of friends involved like I tend to do. Check out some great books like the Ball Guide to Canning (The go to tome of home preservers everywhere!) Food in Jars by Marisa McMclellan or check out this amazing site! Not only are there recipes, but tips to get you started! www.sbcanning.com. Have fun!

Brightest Blessings!

Sunday, July 28, 2013

Cooling Off with a Creamy Treat

It Summer time in Texas! And boy is it hot! I know its been a while since I've posted, but life has finally settled down enough that I could formulate a good recipe and blog to go with it! And what better than a cool treat for those hot summer days?

I have been trying to get into healthier habits, walking in the morning with some girlfriends, eating healthier and watching what sorts of things I put on my plate. In this heat it could be all too easy to go for one of the 'naughtier' treats found in the drive thru of a local fast food joint. Trust me, I've done it! But not only are those tasty things not the healthiest choice, its not the best choice when you have problems with dairy like I do. So I was so very pleased when a good friend of mine in Canada showed me this recipe for a fragrant yogurt cooler. Yogurt is one of the few dairy products that doesn't give me trouble so this recipe definitely appealed to me. It also just so happened that I had bought some of the key ingredients on a whim at Whole Foods when he sent me the recipe too. So I couldn't wait to try it out!

For the scented yogurt cooler you will need:

  • 1 1/2 cups plain yogurt
  • 1 tablespoon flavored water, such as orange or rose
  • 3 tablespoons heavy cream
  • 3 to 6 tablespoons super-fine sugar
  • ice cubes


Now I am lucky enough to have a Magic Bullet blender, which is perfect for mixing up a personal size of this cooler, which this recipe happens to make. As you can see in the photo, I filled one of the mugs about 3/4 of the way with crushed ice. I then glopped in some Greek yogurt, since I like that added protein it offers. A great in between meals treat that curbs hunger.


Next I added in the heavy cream. If you want to cut the fat, and the dairy, you can use low fat non dairy creamer too here, even the flavored kind for a little twist.


Next add in the sugar. I didn't have superfine, so I used regular sugar. You can also substitute Splenda, Equal, or Truvia if you want to use a sugar substitute, or even omit it all together.


Next add in your orange blossom water or you can use rose water too. Its a matter of preference. Do not overuse this or it will make it too perfumey and that isn't really all that pleasant.


Now blizt the whole mix in a blender until frothy and well blended.


All you have to do now is pop in a straw, sit back and enjoy your cool treat! 


This cool and sweet treat is a great way to beat the Summer heat. You can spoil yourself with something cool and creamy without worrying too much about how it will affect your waistline, especially if you use low fat yogurt, creamer and sugar substitute. Its easy to make this a guilt-free snack or even a quick breakfast when you're on the go! Stay cool!

Brightest Blessings!

Tuesday, February 5, 2013

Sunday Dinner: Lasagna!

Last Sunday my brother-in-law, Jason had to fly back to Kuwait after being home on his R&R. I knew my sister and the kids would be really sad and Tara probably wouldn't feel much like cooking. My husband was still home on his own R&R, and he and I had been wanting to make lasagna with fresh pasta. So, we went out and got all the ingredients, put on some Doctor Who, and invited Tara and my little Whovians to come over for dinner.

Making lasagna is a bit of a task at times, but so rewarding! I like to get my sauce cooking first thing in the morning and let it simmer all day. Making the pasta would start about an hour before I want the lasagna in the oven so there is plenty of time to get it just the right thickness and smoothness. Mike was very helpful in this and actually did most of the pasta sheeting himself! I decided to try a few different things with this recipe, which is my own creation after some trial and error over the years. Namely I used Progresso's recipe starter Fire Roasted Tomato sauce to give a bit of depth to my sauce, which proved to be quite tasty.

This recipe made a lot more than I anticipated and will make one large 9x13 pan of lasagna and one smaller 2 quart baking pan lasagna. I let the smaller one sit and cool, then popped it in the freezer for one hour before slicing it up into pieces and sealing them with my vacu-sealer and popping them in the freezer for quick dinners during busy weeks.

For this lasagna you will need:

Sauce:
2 packages ground Italian sausage (I used my local grocer's fresh ground sausage, but Johnsonville's is really good too!)
2 cans crushed tomatoes
1 can Progresso Fire Roasted Tomato recipe starter sauce
2 tablespoons tomato paste
44 oz of tomato sauce
Garlic powder
Italian seasoning
Maggi (German Wurze seasoning, found in your international food section. If unavailable there is a yellow capped versions typically found with bouillon and soup mixes)

Filling:
1 large egg
3 bags mozzarella  cheese
2 cartons ricotta cheese
2 bags five Italian cheese blend
1 cup Parmesan cheese

Pasta:
5 large eggs
3 1/2 cups sifted flour
1/2 teaspoon salt
1-2 tablespoons of water

 
To begin, drizzle a little olive oil in the bottom of a Dutch oven and brown the sausage.


Add the recipe starter sauce, diced tomatoes, tomato sauce, and tomato paste. Add the Italian seasoning and garlic powder to taste. With the Maggi, just a good two shakes of the bottle (Perhaps two teaspoons if you wanted to measure) should provide just enough of that little zip. Its a very unique flavor, but I've found its excellent in pasta sauces. Salt and pepper to taste.


Cover the sauce and let simmer for several hours, at least 2-3 hours, stirring every now and then.


Now about an hour before you want to put your lasagna in the oven is a good time to get your pasta sheets together. Combine all the ingredients for the pasta in the bowl of the mixer, mix on 2 for 1 minute, then switch to the dough hook until ingredients are combined. Turn out on a floured surface and knead until smooth. Let rest for 20 minutes.

Attach the pasta sheeter (or use a hand cranked version) to the mixer and put to level one. Dividing the dough into three or four pieces, flatten each piece and run through the machine, folding into thirds before processing again until you get three passes with the dough smooth.

 
As the sheets are completed, lay them on a damp towel so they won't dry out. Drop the level down to 2 and run the sheets through, you do not need to fold them, just run them through and they will thin and lengthen. Repeat this process until you reach level 4.


Cut the sheets of pasta to fit the pan and preheat your oven to 375 degrees.


Now to mix the filling. Combine the ricotta, egg, one bag of mozzarella cheese and Parmesan in a bowl with Italian seasoning and garlic.


Spray your pan with cooking spray and then ladle about a cup of sauce onto the bottom of the pan.


Lay the sheets of pasta on top of the sauce, then spread with the ricotta mixture. Ladle sauce over the ricotta and sprinkle the Italian cheese blend on top.


Continue to layer in this manner until the top of the pan is reached. The second lasagna was done in the same manner but I used mozzarella instead of the five cheese blend. (I ran out and hadn't realized how much I made!)


Cover the lasagna with foil and bake for 25 minutes. Remove the foil and bake for an additional five to ten minutes or until cheese is browned. Let it rest ten to fifteen minutes to set up.


Yes it got a little messy. But most good food is messy! This was the first time I had ever used fresh pasta in a lasagna and I will do it this way from now on. The pasta was perfectly tender, the cheese melty, the sauce robust and meaty. The leftovers the next day were even better!

Gathered around Doctor Who, we had our dinner, laughing and giggling, pointing out our favorite parts. Tara discovered Captain Jack Harkness and saw why he's such a fangirl favorite! It was a nice evening and I know it made the kids feel a little better, though they still missed their dad terribly. It was still nice to know that a bit of lovin from the oven could be a comfort. I guess that's why its called comfort food!

Brightest Blessings!

Wednesday, January 30, 2013

The Snack Worth Stealing

Everyone has that one recipe that their family goes nuts over. There are feuds for the leftovers, fights over seconds, or even the one whole snags the whole thing and runs off, leaving the others to weep in defeat. Well maybe not that extreme but they are certainly disappointed. There are quite a few of those recipes in my family: Mom's sauerbraten gravy, Tara's Bowl of Comfort, and for me, its my beef jerky.

Years ago, my dad would make beef jerky all the time, especially in the colder months. It was something I always looked forward to. But as time went by, I'm not really certain as to why, likely work got in the way, Dad stopped making his tasty jerky. Since then, I've been wanting a dehydrator to make my own and relive that wonderful taste of home made jerky and avoid the outrageous cost of jerky you can get in the store. (Seriously, 10$ for a bag of dried meat full of preservatives and chemicals???) Last year, my sweet hubby got me a number of kitchen gadgets and appliances, including a Nesco American Harvest food dehydrator. I was so excited! At last I could make my own beef jerky, flavored just how I liked it! But, making the jerky was proving a challenge, and after two tries, I was incredibly frustrated. Not with the actual process of making the jerky. Oh no! That part is easy! It was fighting with the butcher! I researched the proper cut of meat for ideal jerky making and all the major chefs agree: flank is the way to go! If you don't know anything about meat or meat cuts, flank is usually a really thick steak like cut of meat. Its not very easy to cut on a machine, which apparently most butcher's use these days. I went to my favorite grocery chain, HEB, where I buy all of my meat because I can get fresh, organic, hormone free meat. I am very particular about those sorts of things. So imagine my shock, and at times annoyance, when it was like pulling teeth to get someone at their meat counter to cut a flank steak into thin jerky strips. One even told me that she was afraid she'd cut herself. Hello! You work in the meat market! With KNIVES! Oh it was a trial indeed to get the meat cut how I wanted it. So how to solve this problem? We bought a meat slicer from the local Academy in their sausage and jerky food prep department! Now we can just buy the meat and slice it ourselves! Problem solved and now the jerky making can commence!

Now I have always made my marinade with a certain chaotic logic. Mostly it was along the lines of "Oh this might be good!" and throw it in a bowl and whisk it up before dropping chunks of meat into it. So this will be the first time I've had to actually measure things, but it did come out really good. However, this is by no means the "YOU HAVE TO DO IT THIS WAY!" kind of recipe. Its a basic idea that I use and my family adores, but you can add and take away from it however you like to make it your own.


For my stealable beef jerky you will need:

1 flank steak (you can also use top round roast, the butcher folk don't have as much issue cutting that if you don't have your own meat slicer, or if you can't find flank. It works just as well, and will yield more meat, so you will have to increase your marinade a little bit and likely dehydrate in batches)
2 tablespoons liquid smoke (I used mesquite flavor)
1/2 cup of soy sauce
1/4 cup Worcester sauce
1/4 cup A1 steak sauce
1 tablespoon minced garlic
2 tablespoons local honey
2 tablespoons hoisin sauce
1 tablespoon of yellow mustard
1 packet jerky seasoning (I found this in the canning/preserving section of Wal-Mart, thought it would be worth a try, and it was! Just don't use the curing salt, it makes the end product too salty)

First things first. Slice the meat if you did not buy it pre-sliced. Lucky for me, my hubby was home on his R&R and was able to help out on this! For flank, you are actually cutting lengthwise, which is one of the reasons butchers will give you a trial about it. If slicing it at home, it works best to cut the steak in half width wise, before putting it on the machine to slice. You want it thin, but not paper thin, but no more than 1/4 of an inch thick. Thicker meat will take longer to dehydrate, so try and keep the meat uniformly thick.


While Mike was slicing up the meat, I went ahead and got the marinade going. I went ahead and pre-measured everything to make it a bit easier to assemble.
 
 
Left to right, going across the top then to the second row we have: Soy sauce, Worcester sauce, honey, garlic, then A1 steak sauce, liquid smoke, hoisin sauce and mustard. Beside that is the packet of seasoning.
 
Combine all the ingredients into a bowl, and whisk them together. You may want to let the sauces warm to room temperature if they have been refrigerated as the honey will try to seize up on you a bit and you'll be whisking for a while to get it combined!


Drop in your sliced meat, insuring they are all pushed down into the liquid and completely coated. If you ended up with more meat than marinade, just add a bit more of the ingredients until its sufficient to coat all the meat. Be adventurous! Eyeball it!


Once you have all the meat in the marinade, cover it with cling wrap and park it in the fridge for at least four hours. Overnight is better, but four hours will allow the flavors to penetrate and marry if you're pressed for time.


After you have let your meat marinate for a good while, place the meat on the trays of your food dehydrator, making sure that the meat is fully flat, and not overlapping any other slices of meat. If you have a lot of meat, you may have to do this in batches.

 
Set the dehydrator to 165 degrees and leave alone for four-six hours, depending on the thickness of the meat. Don't make the mistake I did and leave it over night, and sleep way longer than you meant to. You'll have crispy beef jerky. Tasty, edible, but crispy and not quite what we're looking for. The best idea is to let the meat dehydrate but check it every so often to ensure its coming along nicely, removing any thinner pieces of meat that may have finished before the others so that they don't turn into beef crispies.
 
 
When the meat is done, meaning it is not soft, or wet in any places, or looking 'raw' (Again bear in mind that thickness of meat can make the drying temperatures vary), remove from the dehydrator and let it cool a bit, because it will be hot! Then, enjoy!
 
Beef jerky will keep well for weeks as long as its kept in an airtight container or zip top bag. Its likely it won't last that long! And be cautious of bringing jerky to a family gathering. It will likely go missing! In my case, it went right into my dad's pocket! I had to make another batch right away for my sister and her husband, and they declared it addictive!
 
When making jerky at home, you not only save money, but you get to experiment with flavor profiles and control exactly what goes into your finished product. You can cut back on the salt, if you need to watch your sodium intake, or use turkey instead of beef if you're watching your cholesterol. It can truly be a healthy snack that packs a punch when it comes to protein, and can be satisfying when trying to curb your hunger between meals. (So long as you don't mow down the whole bag! Its an easy thing to do!). I've found that making my own snacks at home, rather than buying them from the store is not only healthier, cheaper, but far more rewarding and usually tastier too!
 
Brightest blessings!


Friday, January 25, 2013

Still Alive!

I know it has been ages since I've posted anything! I'm sorry! But my hubby came home for his R&R and the poor dear has been sick for most of his time home, leading to him extending his time home for a bit. As you can imagine I've been using a lot of that time to tend to him and catch up on some knitting. But I wanted to at least make a post indicating I'm still around and not ending my blog by any means. Just taking a break until I have time to make some tasty things to post about!

On the good news side of things, I completed my schooling and graduated with honors from Ashworth College. I plan to look for a position in Medical Transcription very soon and am quite nervous and excited about that prospect to be honest.

So! I have some things in the works and intend to put up a new blog soon. It may be food related, or fun related or who knows! But, there will definitely be something coming soon, so keep watch!


Brightest Blessings!